Dieser Bericht wurde veröffentlicht von:
Motor Cycling
04. Juli 1934
Seite 288 und 289

Is Your MORGAN Ready for the Holidays?
If Not, These Hints and Tips from an Owner-Expert Will be of Use to You
A COMPARATIVELY short article such as this obviously does not lend itself to the description of a full overhaul of a Morgan. All that is attempted, therefore, is to set out some of the more important details which should receive attention if a trouble-free holiday is to be.ensured.
The first item for attention should be the brakes. The two front brakes have a very simple compensating device, operated by a single Bowden cable. This should be completely disconnected from the brake levers and inspected for wear and rust where it enters the casing. If everything is in order, thoroughly lubricate the cable (vaseline mixed with petrol makes a good lubricant) and replace.
Brakes
Take care to allow sufficient slack in the cables to enable the wheels to be turned to the limit of each lock; then fix the casing to the frame with insulating tape.
To adjust the brakes slacken the two bolts holding the small clip to the central tube of the chassis and shift the clip forward until the slack is taken up. Jack up the front wheels, set both wheels spinning at equal speeds, and get a friend to apply the brake lever. If the wheels do not stop simultaneously, remove the big nut and star washer and tap out the spindle from the sliding axle.
Then rough over the linings of the deficient brake with a rasp and grease the cam faces and other bearings in the operating gear. This should cure the trouble. Be careful not to let any grease get on the brake linings.
Test the front wheels for side play. If any is evident adjustment should be made by first removing the castellated nut and locking washer exposing the cone. The cone should next be screwed in until there is still just a trace of play after the washer is replaced, and the nut tightened up again.
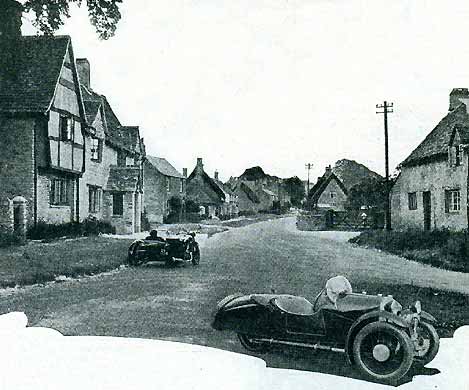
One of the 1934 Sports Morgans in Munster Lovell, in Oxfordshire,
a delightful little village just off the main Oxford-Burford road.
Take up any excessive play in the steering gear by undoing the three bolts round the top half of the steering column, where it enters the box, and twisting the eccentric boss until it is felt to tighten. Do not tighten it right up. Apply the grease gun to the nipple on the top of the box.
In your enthusiasm for greasing do not in any circumstances grease the steering arm pins at the ends of the track rod, as these are tapered and act as a damper on the steering.
Transmission
Transmission should be the next item on the programme. On two-speed models the best method of greasing the clutch is to ignore the grease nipples on the flywheel: get right underneath the machine and put the grease in by hand. This may be a dirty job, but it is well worth the extra trouble, as the lubricant gets right into the clutch thrust race as well.
On models prior to 1930 the process of taking up slip in the clutch is a fairly simple matter. The spring tension is controlled by four nuts on the clutch face. These should each be turned equally in a clockwise direction and then rewired (through the holes provided) to prevent their unscrewing.
On later models it is necessary to take the engine out of the frame to make this adjustment.
Check and fill the gearbox or bevel box, as the case may be, and, on two-speeders, have a look at the selector forks. If they show signs of wear it is better to replace them at once. They are quite cheap - about 1s. 6d. each - and are easy to fit, being held on their shaft by one nut. Grease everything well, including the gear dogs and dog sprockets.
Chains
Take off the chain or chains and give them a good soaking in paraffin. Then dry them off and leave them for a while in a tray of molten grease; Castrolease No. 2 is excellent stuff for the purpose.
When replacing the chains see that the wheel is central in its forks and that the chains are not too tight - about 1½ ins. of slack on the bottom runs should be satisfactory.
Jack up the model under the bevel box until the rear wheel is clear of the ground and then-oil the spring leaves with penetrating oil. While the machine is still on the jack, examine the rear tyre and see if the valve is square with the rim. The acceleration may have caused the tyre and tube to creep on the rim, with a tendency to pull out the valve.
Go round all the body nuts and bolts with a spanner. On some models the petrol tank is supported by a central rod locked by two nuts at the bottom end. Unless these nuts are quite tight an elusive rattle may develop.
I have purposely left to the last the subject of engine maintenance, as this follows the same general principles dealt with in many previous articles in Motor Cycling. There are one or two points, however, which may bear repetition.
Controls
All the controls should be disconnected and examined for wear. It is far better to replace at once any that are in doubtful condition, as a breakdown on the road can waste a lot of time - and temper. If they are quite sound, oil them thoroughly and replace.
Check over the valve clearances, the contact breaker points and the clearance at plug points. Missfiring can often be traced to a faulty high-tension wire, and if there is any doubt about these they should be replaced with new ones of the correct size.
Check over the electrical wiring and see that all connections are tight. If necessary, top up the battery and clean and vaseline the terminals.
This article does not aspire to absolute comprehensiveness, but the owner who has checked over every point mentioned will have gone a long way towards ensuring a trouble-free holiday with his Morgan.
A.M.


Sind Sie durch die Hintertür gekommen und jetzt fehlt die Navigationsleiste?
 Wenn Sie auf der linken Seite keine Navigationsleiste vorfinden, ein Klick auf den "Homepage & Index"-Button genügt und unsere Homepage mit den Links wird geladen!
